A Beginners Guide to Operating a Computerized Single-Head Embroidery Machine
Have you ever marveled at an aesthetically pleasing embroidered design on a hat or a shirt and wondered how they make it? Well, today, we are learning everything about sewing with computerized single-head embroidery machine! You will want one of these machines because they make it so easy for you to do really beautiful designs on fabric.
How does computerized embroidery work?
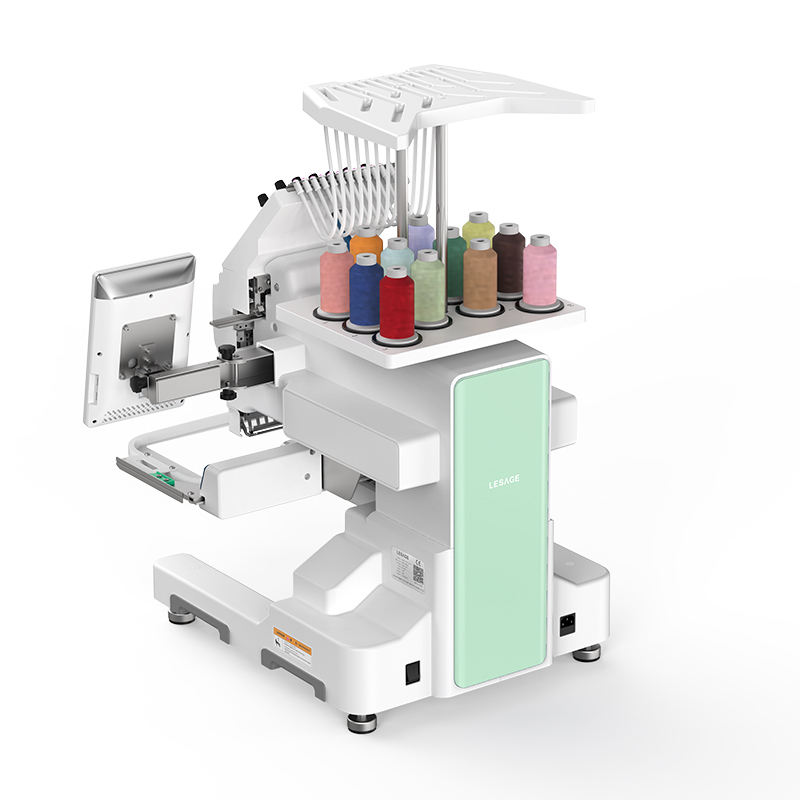
Embroidery is a method used to decorate fabric, such as shirts or hats, with designs that are sewn onto fabric. We don't necessarily need to do it manually, we can achieve this through computerized single head embroidery machine. The commercial hat embroidery machine is quite advanced and can create detailed designs from the touch of a button! It comes with a screen that allows you to select and even modify the designs as they are being sewn in the fabric. This means you can create your own unique creations!
Getting Your Machine Ready
Getting the machine set up correctly is very crucial before you start embroidering. You must have the correct colors of thread and type of fabric first. The commercial patch embroidery machine can make your design, and it can break it too! From there, you’ll thread the machine according to the instructions in the manual. This portion is crucial because if you do not thread the machine properly, it will not work. Next, you need to hoop the fabric tight. That means you will be holding the fabric steady so it doesn’t slide around while the machine is sewing. The moment you step on the pedal to stitch, the design appears, so you need to preview before the reality. Before you start, be sure to make it look just so, and be sure you are happy with it.
Selecting and Preparing Designs
A computerized embroidery machine comes with the amazing feature of choosing designs to embroider. So many fun ones to choose from! You can either choose from hundreds of designs pre-loaded on the best embroidery machine for business or create your own designs with special computer software. Make your own designs, and get super creative. After selecting a design, that design needs to be digitized. That means that you will translate it into a format that the machine can read so it can correctly stitch out the design. This sounds a little complicated but well the if you follow me. After some practice, you'll be stitching beautiful embroidery in no time and having a lot of fun doing it.
Using the Control Panel
A computerized single-head embroidery machine control panel can look intimidating, but don’t fret it’s a lot easier than you think! The primary buttons you’ll need to be familiar with are for selecting designs, changing thread colors and starting or stopping the machine. There might also be buttons that allow you to adjust the speed at which the machine stitches or the size of the design you wish to make. Use a little time to familiarize yourself with the control panel. You can hit various buttons to see what they do. Before long, you’ll be using it like a champ!
Fixing Common Problems
And even with careful setup, sometimes things still go wrong during the embroidery process. This is completely normal! They are common problems which generally likely to be faced when the thread breaks, the fabric gets wrinkled, or the designs fail to line up correctly. There is no need to panic if you are facing any of these problems! There are some easy fixes you could try. First of all, notice the tension of the thread. That means you need to check whether it is too loose or too tight. Then the fabric should be hooped tightly, not slack. And last but not least, this will kick off a bit if the design is not aligned and you can drag it back to where it needs to be. Troubleshooting with calm and your problem-solving skills can repair anything done during embroidery.
Overall, a computerized singlehead embroidery machine can be an enjoyable and fulfilling process. From learning the basics of computerized embroidery to correctly setting up your machine, to choosing and preparing designs, the use of the control panel, and fixing common problems, you will be well on your way to stitches that rival any store-bought embroidered creation! Remember to just practice and be patient with yourself, with time and dedication you will be a great embroiderer and you will be able to create lots of amazing projects with your machine!
Comments
Post a Comment